|
SCENE C++ API
2.1.0
|
|
SCENE C++ API
2.1.0
|
The lifecycle of an app describes the events and states an app runs through when cycling between its active and inactive state within SCENE. In general, apps can be activated and deactivated at any time from within SCENE and thus may run through their lifecycle multiple times while a SCENE process is active. When an app is activated in SCENE, the lsAppStartup() function is called immediately after the app dll has been loaded, giving the app the opportunity to perform its own initialization. Analogously, when an app is deactivated, SCENE calls the lsAppShutdown() function of the app to provide the opportunity for any cleanup functionality before the app dll is unloaded. Every app must implement and provide both of these lifecycle functions in order to be loadable by SCENE.
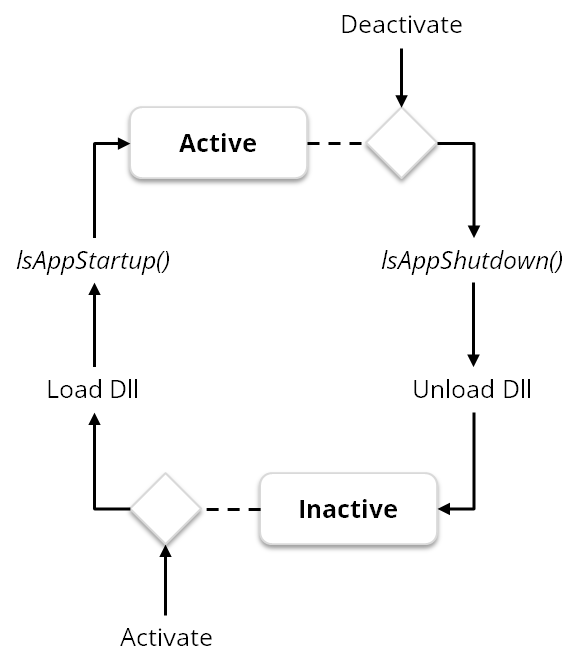
The App lifecycle within SCENE. During its activation, an app is first loaded and then lsAppStartup() activation function is called before the app actually becomes active. When deactivating an App, SCENE first calls the lsAppShutdown() deactivation function before unloading the App.
Defining user interface elements which allow the user to initiate certain actions is an important task for many apps. The SCENE API provides functionality to seamlessly integrate app defined UI elements into the SCENE user interface. This article describes how new UI controls can be added to SCENE and how certain functionality can be executed once these controls are triggered.
In order to be able to add UI elements to the SCENE UI, some preparations have to be made so that SCENE is able to identify the proper resources which are part of your app dll. In Visual C++ projects, the resource definitions are typically automatically added to a file called resource.h. The contents of this file need to be made available to SCENE so that the resource definitions can be automatically parsed. In order to make the contents of the file available, you can do the following:
In order to add a new menu entry to the SCENE menu bar, you need to create a new menu resource with the entry and bind a registered task to it:
After you have added the menu resource as well as the menu entry, you can use the SCENE application context of your app to bind a task to the created menu entry so that it is executed once the entry is triggered:
using namespace SCENE_API;

// Bind a registered task to a menu entry
// sceneContext: The SCENE application context
// ID__MENUENTRY: The resource ID of the menu entry
// task: A task instance which has already been registered with the
//       application context
sceneContext->bindTask(ID__MENUENTRY, task);
Similar to adding menu entries to the SCENE menu bar, you need to add a new toolbar resource to your project and add a new toolbar button to that toolbar to which you can bind a registered task. To add a toolbar to the SCENE UI you can do the following:
Note: The toolbar resource ID needs to start with "IDR_" to be correctly read in by SCENE.
After you have added the toolbar resource as well as the toolbar button, you can use the SCENE application context of your app to register the toolbar itself and to bind a task to the created toolbar button so that it is executed once the button is triggered:
using namespace SCENE_API;

// Bind a registered task to a menu entry
// sceneContext: The SCENE application context
// ID_TOOLBAR_BUTTON: The resource ID of the menu entry
// task: A task instance which has already been registered with the
//       application context
sceneContext->bindTask(ID_TOOLBAR_BUTTON, task);

// Register the toolbar with SCENE. The toolbar will only be shown
// if at least one toolbar button is also bound to a registered task
// sceneContext: The SCENE application context
// toolbarName: The name of the toolbar as it will be display in the SCENE
//              View > Toolbars menu
// IDR_TOOLBAR: The resource ID of the toolbar
sceneContext->registerToolbar(IDR_TOOLBAR, toolbarName);
SCENE provides a number of different views which can be used to visualize the available point data in different ways. The SCENE API currently only offers access to those views which visualize the available data in 3D. This article describes how you can use the available view interfaces in order to open views in SCENE and visualize custom content with your app.
In SCENE, an arbitrary number of views may be open at any time while only one view can be active and processes user inputs. Additionally to the views which are displayed to the user there may also be different offscreen views which are used to render data which should not be displayed to the user. Using the getActiveViewer() and the getViews() method of the application context, you can get the currently active view as well as a list of all the supported views which are currently opened in SCENE. Apart from accessing the opened views you can also create new views by calling the createView() and createOffscreenView() method of the SCENE application context.
using namespace SCENE_API;

void create3dView(ref_ptr<LSSceneContext> context)
{
        ref_ptr<LSView> view;

        // Create a new ordinary 3D view
        LSResult::Result res = context->createView(
                 LSView::VIEW_3D, // The view type of the view
                     0, // 0 to create a view on the whole workspace
                     view // out parameter containing the created view
                 );

        // Check whether the view could be created
        if (res != LSResult::Ok)
        {
            // The view could not be created. Check the result code for more
        // information about the error.
        }

        // The created view may be cast to an LSView3d pointer to access
        // additional functionality
        ref_ptr<LSView3d> view3d = dynamic_pointer_cast<LSView3d>(view);
}

void createOffscreenCorrespondenceView(ref_ptr<LSSceneContext> context)
{
        ref_ptr<LSView> view;

        // Create a new offscreen correspondence view
        LSResult::Result res = context->createOffscreenView(
                 LSView::CORRESPONDENCE_VIEW, // The view type of the view
                     0, // 0 to create a view on the whole workspace
                     view // out parameter containing the created view
                 );

        // Check whether the view could be created
        if (res != LSResult::Ok)
        {
            // The view could not be created. Check the result code for more
        // information about the error.
        }

        // The created view may be cast to an LSView3d pointer to access
        // additional functionality
        ref_ptr<LSView3d> view3d = dynamic_pointer_cast<LSView3d>(view);
}
3D views provide additional functionality which can be accessed after casting a created view instance of the appropriate type to an LSView3d type. Any view of a VIEW_3D, CORRESPONDENCE_VIEW, and LAYOUT_VIEW type can safely be cast to an LSView3d type. You can query the type of a specific view instance by calling the getViewType() method. Using the LSView3d interface apps are also able to introduce custom rendering code, e.g. to render additional objects together with the objects that are already rendered by SCENE. Custom rendering code is included by creating a custom render object which is derived from the LSRenderable3D interface (or one of its sub-classes). This interface provides an overridable render() method which you can overwrite to implement your custom render code. LSRenderable3D objects can then be added to the rendering routine of a view instance using the addRenderable() method of the view instance. The next time the scene is rendered SCENE will then call the render() method of your renderable class, giving you control in order to add your own OpenGL calls.
To add 3D objects to the scene of a 3D view, you can make use of the LSSceneNode3D interface which extends the LSRenderable3D interface and adds custom functions to translate and rotate your custom object in the 3D scene. The following code shows the implementation of a simple 3D object which draws a quad using OpenGL calls:
using namespace SCENE_API;

class Quad3D : public LSSceneNode3D
{
    virtual void render()
    {
        glColor4f(0.0, 1.0, 0.0, 0.5);
        glBegin(GL_QUADS);
        glVertex3f(0, 0, 0);
        glVertex3f(2, 0, 0);
        glVertex3f(2, 0, 2);
        glVertex3f(0, 0, 2);
        glEnd();
    }
};

void addQuadToView(ref_ptr<LSView3d>& view)
{
    view->addRenderable(new Quad3D);
}
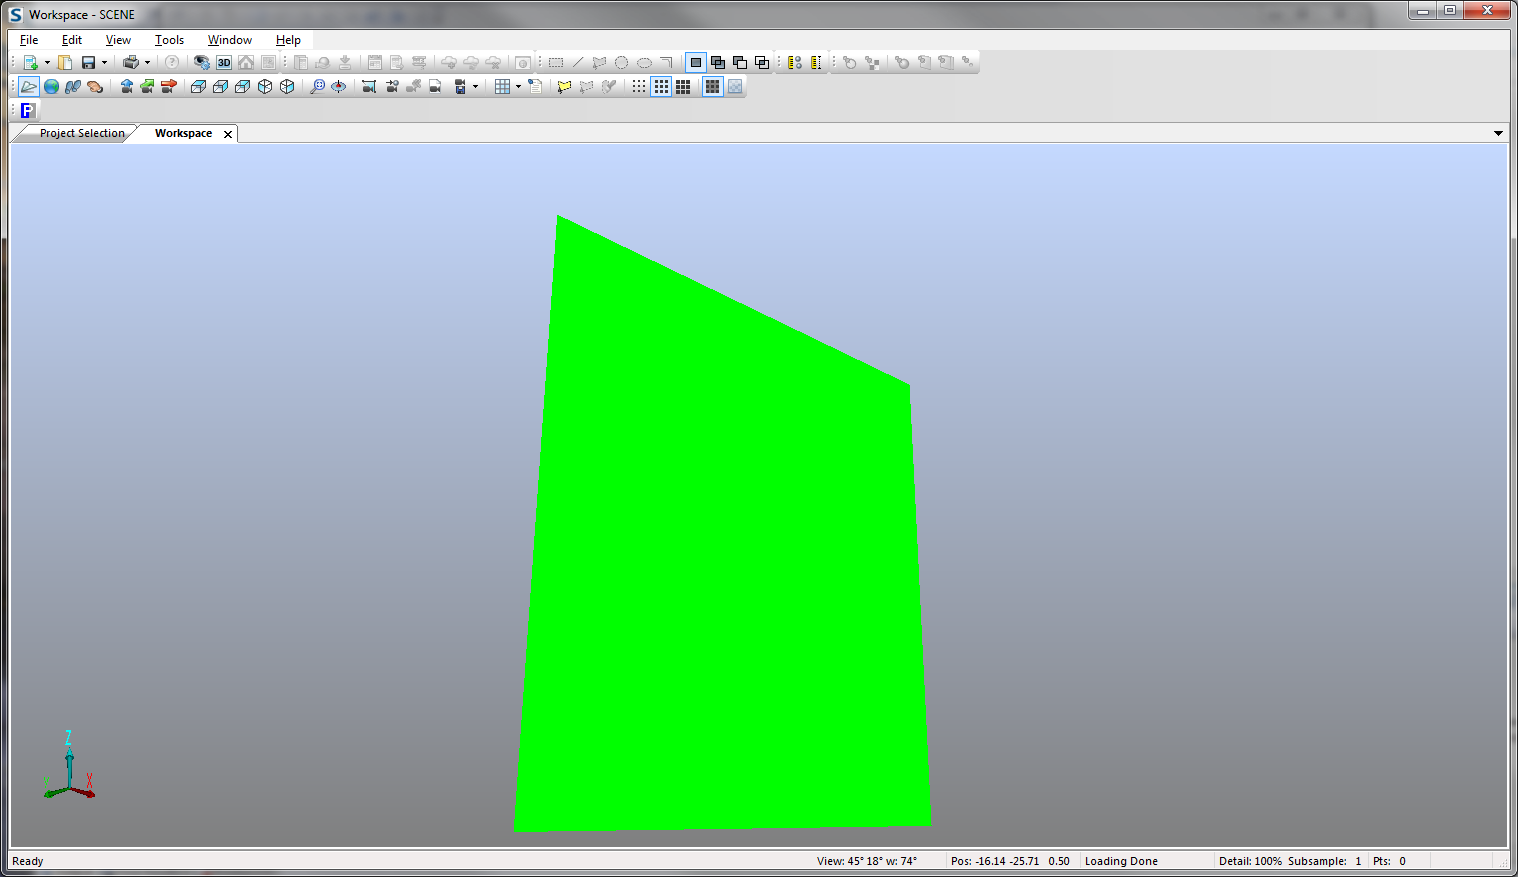
The quad rendered by the Quad3D object.
Overlays represent special objects which aren't rendered as part of the 3D scene but instead act as if being attached to the surface of the screen. Overlays are especially useful to render HUD (head-up display) like objects which should be visible at a fixed position of the view rather than at a fixed position in the 3D scene. Similarly to 3D objects, the SCENE API provides an LSRenderable3D derived interface, the LSOverlay3D interface, to ease up the use of overlays for apps. When rendering overlays, 2D screen coordinates are used for any OpenGL calls. The following code shows the implementation of a simple overlay which draws a quad to a fixed position of the view.
using namespace SCENE_API;

class QuadOverlay : public LSOverlay3D
{
    virtual void render()
    {
        glColor4f(0.0, 1.0, 0.0);
        glBegin(GL_QUADS);
        glVertex2i(200, 200);
        glVertex2i(0, 200);
        glVertex2i(0, 0);
        glVertex2i(200, 0);
        glEnd();
    }
};

void addQuadToView(ref_ptr<LSView3d>& view)
{
    view->addRenderable(new QuadOverlay);
}